Should you observe that the display on your thermostat isn't lit, or if it appears that your HVAC system isn't operating correctly, this could suggest a problem with a section of the power supply tasked with maintaining the functioning of the system components.
From dead batteries to tripped breakers, I outline the 8 steps to troubleshoot and fix this problem.
At SmartHomePerfected we always advise readers not to undertake any work they are not competent in performing and if in any doubt, it is best to seek the assistance of a professional.

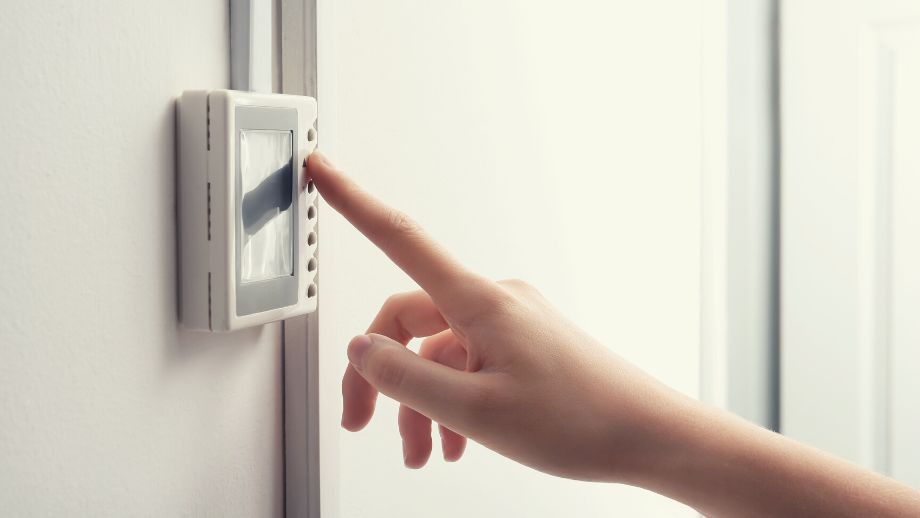
1. Try Waking Up the Thermostat
The first and most obvious thing to do is check if the thermostat display powers up.
Press a few buttons, or if you have a touchscreen: tap or swipe anywhere on the screen to see if you get a response.
If the screen doesn’t come on, you should continue the diagnostic steps below. Alternatively, if you have just installed the thermostat, there may be problems with your initial setup.
If you have a Honeywell model, check out my guide on Honeywell thermostats that have a blank screen.

2. Check the Batteries
If the power supply isn’t a problem and the screen on your thermostat still won’t come on, chances are that the batteries have died (although some thermostats will have a low battery indicator before the screen completely dies off).
Alternatively, if your thermostat is hardwired, it may be a temporary problem – maybe your thermostat is recharging, restarting, or performing a firmware update via Wi-Fi.
With thermostats that depend on batteries, replacing them is very easy and the process is nearly identical to all brands and manufacturers. For example, with Honeywell thermostats, you only need to remove the faceplate and replace the batteries at the back of the panel – click here for details. For Nest thermostats, the process is more complex as it involves the C-Wire – click here for details.
The process of removing the faceplate might vary, so check your product’s user/installation manual for instructions.

3. Ensure the Thermostat Panel is Completely Secured
The dead screen may be caused by the thermostat not being pressed in fully on the mounting plate – to the point where the contacts have become loose.
It's crucial that the panel is tightly secured to the mounting plate, as a loose connection can cause the screen to remain blank. Take a close look at your thermostat, and if necessary, detach the thermostat and reattach it by pressing the panel firmly into its designated position.
When the panel audibly clicks and is level with the mounting plate, you can be confident that it is properly installed.

4. Check the Wiring
Your next step is to check the thermostat wiring, so make sure to disconnect power to the entire HVAC system, remove the thermostat front panel, and check the wires and terminals.
To make sure the wiring is connected correctly, follow the steps below:
- Turn off the power
- Open the thermostat’s faceplate and physically examine the wires and terminals to ensure they are tightly connected. Lightly tug on each wire and see if they come out. You especially want to pay attention to the red wire with the R/Rc/Rh terminal.
- If there are any loose connections, fix them and make sure the connections are secure and free of dust and dirt.
- Next, if your thermostat requires a C-wire, make sure the connection is intact and secure.
- If possible, check the thermostat wires at the other end, usually at the furnace control board, to see if they are loose or damaged.
- Try reconnecting the wires and making sure they’re tight
- With everything reconnected, turn the power back on and see if the thermostat lights up.

5. Check the Voltage at the Thermostat Wires
If you reconnect the wires, but the thermostat still doesn’t power up, the thermostat cable might be damaged somewhere in between, or the furnace control board might be malfunctioning.
To confirm these, it’s best to check the voltage at the thermostat contacts with a multimeter. Here's how:
- First, turn off the power to the thermostat
- Then, remove the thermostat display from the wall
- Then turn the power back on to the thermostat
- After that, configure your multimeter to measure AC voltage
- Insert the red probe into the “R” terminal and the black one into the “C” terminal of the thermostat wiring. Be careful not to touch any of the exposed contacts or wiring when doing so.
- Check the voltage reading, it should be around 24-30V
If the voltage is lower than this range, it could indicate a disconnection or malfunction with the furnace control board.
However, when measuring the voltage, exercise caution around the wires and remember to take the necessary safety precautions, these contacts are live and could electrocute you or damage the internal circuitry.

6. Check If the Thermostat is Clean
A dirty thermostat can also disrupt the power supply. As such, it’s a good idea to clean the interior of your thermostat from time to time.
Cleaning your thermostat will not only sort out the power problem but also help improve its efficiency.
While you can find different thermostat models and designs in the market, the process of opening them up and cleaning them is pretty much the same.
The only difference is usually the faceplate opening mechanisms – some snap off, others slide and the rest need to be unscrewed.
To Clean a Thermostat:
- Turn off the power
- Remove the cover or faceplate.
- Then, using a soft-bristled brush or a can of compressed air, clean between the switches and other components.
- To clean between the smaller crevices and contact points, use a thin piece of cloth or cotton buds to clean out dust and debris. *Make sure you don’t touch the interior with your fingers to avoid damage.
- After cleaning the interior, reattach the cover or faceplate and turn the power back on.
While cleaning thermostats is essential, certain models with a sealed enclosure may not allow for it.
For example, if you have a smart thermostat, specifically with batteries, you must avoid cleaning its interior. All you have to do is clear out any dust or debris on the exterior surfaces and wire terminals in the back.

7. Check Power Supply
In most cases, a dead thermostat is because of your home's power supply, so check to see if the circuit breaker has tripped or if any fuses have blown.
You can easily find out if the circuit breaker has tripped by checking your home's electrical panel board, wall outlets, and any safety switches assigned to your HVAC system.
Simply turn on or reset these switches to restore the power supply.
However, if a fuse is blown, there’s no way around it, you will have to replace the blown fuse.
Also, when purchasing new fuses, make sure to stock up on a couple of extra fuses so you’re always prepared.
Possible Causes for a Tripped Power Supply
In many cases, a tripped circuit breaker or a blown fuse is caused by a power surge. Alternatively, the HVAC system might be incompatible with your power voltage such as when your thermostat needs 240V input and is connected to a 120V power supply.
Beyond that, the problem may lie within the HVAC system itself.
To protect the user, HVAC systems are built with safety switches and disconnects that work like circuit breakers. On top of that, certain components like air conditioners might be connected to GFCI-protected outlets that may trip on their own.
So, if any of these switches have tripped, simply reset them to the “on” or “closed” position. If the problem persists even after turning the switch on, then it's best to get help from a professional.

8. Check the Condensate Drain Pump
A float switch or drain pump is very common in systems with an A/C unit since these will help shut off the system to avoid water damage and possibly, drain out the excess water.
Water leakage is a major safety issue, so when the drain pipe is blocked, the float switches can shut down the HVAC system, without any prior warning.
Float Switch with a Drain Pipe
If your system has a float switch attached to a drain pipe, you can take out the float switch or end cap and try to unclog the drain pipe.
Condensate Drain Pump
If you’ve got a condensate drain pump with a reservoir filled with water it might have switched off the HVAC system. Either the drain pump is not working or it’s not plugged into a wall outlet.
These drain pumps are usually connected to a GFCI-protected outlet that will immediately open/disconnect the circuit as soon as it detects an earth fault or current leakage. Therefore, check for any signs of tripping in GFCI-protected switches and try resetting them if needed.
Also, if there’s water on the ground, make sure the power is off before cleaning it up.
Try cleaning the drain pump reservoir and making sure the outlet valves and vents are clear of any blockages. Then, check for pump operation and it works: try re-installing it to your HVAC system.
Final Step: Bypass the Thermostat
To figure out if the thermostat is indeed defective, you can perform a bypass to see if the blower, heating, or cooling equipment can turn on without the help of the thermostat.
If any of these pieces of equipment can turn on during the bypass procedure, you can be certain that the fault lies within the thermostat.
In that case, you can either replace it or get it repaired.
To bypass a thermostat:
- First, switch off the power to the thermostat and the HVAC system
- Then, open up the thermostat front panel and remove it from the wall mount
- Then, jump the R and G wires (you can also jump the R with W for the furnace or Y for the A/C)
- Switch the power back on and see if the blower, furnace, or AC you created the short connection with, starts up without any issues
- If so, you can try checking the other components of the HVAC system for good measure, but you can already tell the thermostat is defective.
If the equipment doesn't turn on, it might be an issue with that corresponding piece of equipment, so I recommend troubleshooting further or enlisting the help of a professional.
Perhaps it’s Time to Replace the Thermostat?
If you find the thermostat to be at fault, it may be that your device is beyond repair and needs a firm replacement.
So if you have been with the same thermostat for many years, it’s definitely time to go for an upgrade.
The Verdict
If your thermostat’s display is blank or there’s no power coming into your HVAC system, it is usually due to a tripped breaker or a safety switch.
However, there can also be more serious issues such as damaged wiring and a faulty thermostat, so I highly recommend going through the list of possible causes mentioned above and getting help from a professional if you’re not comfortable troubleshooting yourself.